
Web Controlled Robot
Build a web-based controller for your Raspberry Pi robot!
In this project, I show how to control a Raspberry Pi robot from a web page. The web page will show a video image of the robot and some buttons to control the robot's movement. This project shows you how to stream the video from a Raspberry Pi camera using Flask. Messages are sent to the robot using the MQTT protocol, which is a standard for IoT (Internet of Things) messaging.
This tutorial assumes you know how to set up a Raspberry Pi and use the terminal window to run commands.
How it Works
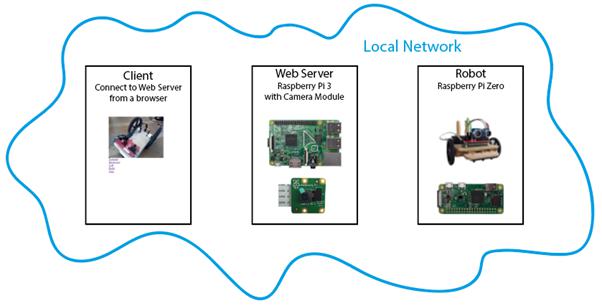
There are 3 computers interacting to make this work.
The client is the computer that the user is connecting from. This runs the browser that connects to the web site.
The web server is the computer that runs the web site. For our purposes, this will be a Raspberry Pi 3 with a connected camera. It handles requests from the client to see the web page and operate the robot. It has a camera that is used to see the robot. When it gets commands to operate the robot, it sends these commands over the network to the robot.
The robot is a computer that can run the electronics of the robot. For our purposes, this will be based on a Raspberry Pi Zero. It receives commands from the web server and carries them out.
For the computers to interact, all 3 of them need to be connected on a network. This could be our local network at home:
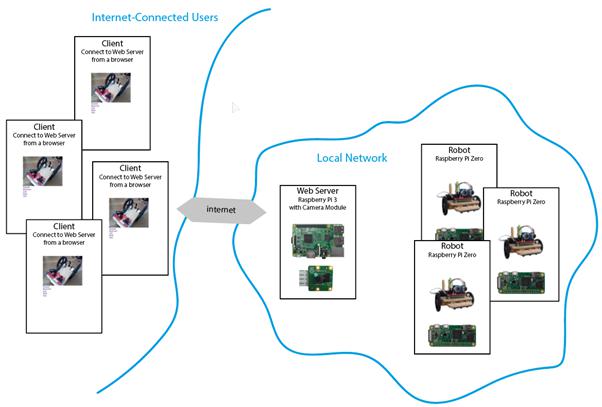
Or we could allow the user to connect over the internet:

We may even want to scale this up to allow multiple internet-connected users to control multiple robots:
Building the Web Server
You will need…
For this part of the project, you will need:
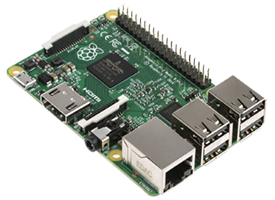
- A Raspberry Pi 3 or Raspberry Pi 4
- An SD card, with Raspbian installed
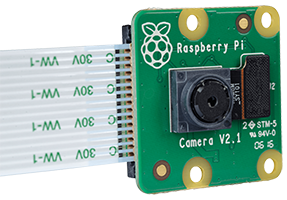
- A Raspberry Pi camera module (you need the Raspberry Pi 3 one, not the Pi Zero one)
I will assume that you already know how to set up a Raspberry Pi. If not, have a look here:
I will also assume you know how to connect the camera module. If not, have a look here:
Configure the server
To proceed, make sure you have your Raspberry Pi 3 and camera running and connected to your network.
We are going to install a few packages! Most of these are straightforward, but if you run into difficulties internet forums are there to help!
Start up a terminal session on the pi.
First, update the package lists, to ensure our installs get the latest versions and dependencies of the packages we will install.
sudo apt update
Install and test mosquitto
![]()
Mosquitto is a library that allows one computer to communicate with another one. It is a standard for IoT (Internet of Things) communication. Let's install it. From a terminal session run the following:
sudo apt install -y mosquitto mosquitto-clients
To test this, we will send a message from the web server to itself. You will need two terminal sessions open. In the first one, you will subscribe to the messages. In other words, you will listen out for messages being sent over the network. Here, we subscribe to a topic called 'mytopic':
mosquitto_sub -t mytopic
When you run the above command, it will sit there, waiting for incoming messages.
In the other terminal session, you will publish a message. In other words, you will send a message out on the network to whichever other computer is listening to the topic 'mytopic':
mosquitto_pub -t mytopic -m "Hello robot"
The subscriber terminal session should show the message:
Hello robot
Press Ctrl-C to stop the subscriber.
Install and test the MQTT python library

In order to use Mosquitto from Python, we need to install another library called Paho MQTT. Install it using the following command:
sudo pip3 install paho-mqtt
Test it by running this:
python3 -c "import paho.mqtt; print(paho.mqtt.__version__)"
You should see the version number, something like this:
1.5.0
Get the web server code
The web server code can be found on GitHub. Download it using the following command:
git clone https://github.com/lewfer/web-controlled-robot
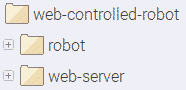
Once that has finished, you should have a directory structure looking like this:
Run the code
Change to the directory where the web server is running:
cd web-controlled-robot/web-server
Then run the web server:
python3 web_site.py
You should see a confirmation that the web server is running:
* Running on http://0.0.0.0:5000/ (Press CTRL+C to quit)
From another computer on your network, start a browser and navigate to the Raspberry Pi web server. The url below assumes your web server’s name is web-server. If it’s something different, just change it.
http://web-server:5000
If this doesn't work, you can try navigating to the IP address of your web server. You can find the IP address of the server by running the following command its terminal session:
ifconfig
The IP address will be displayed:
<wlan0: flags=4163<UP,BROADCAST,RUNNING,MULTICAST>mtu 1500
  inet 192.168.2.205  netmask 255.255.255.0  broadcast 192.168.2.255
  inet6 fe80::54d2:b8c1:9ac2:5d6e  prefixlen 64  scopeid 0x20
You can then browse directly to the IP address:
http://192.168.2.205:5000
You should see the web page, with the camera view:

Understand the code
I'll add some more notes here at some point, but take a look at the code and comments in these files:
web_site.pyis the main Flask app. It handles all the requests to the web site.pi_camera_player.pyhandles the reading of the video feed from the Raspberry Pi camera.webcam_player.pyis not used, but gives you the option to use a webcam rather than the Raspberry Pi camera.
You will need to install some additional libraries to get this to work.
- In the
templatesdirectory,index.htmlis the web page layout, with a place for the video and the robot controls.
Building the Robot
You will need…
For this part of the project, you will need:
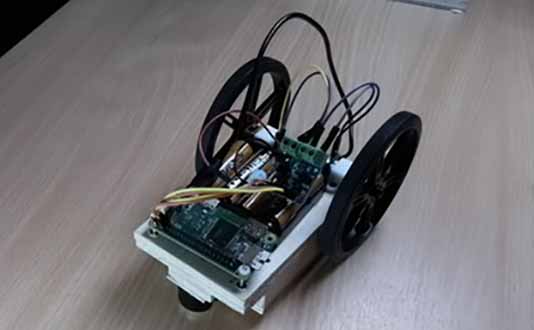
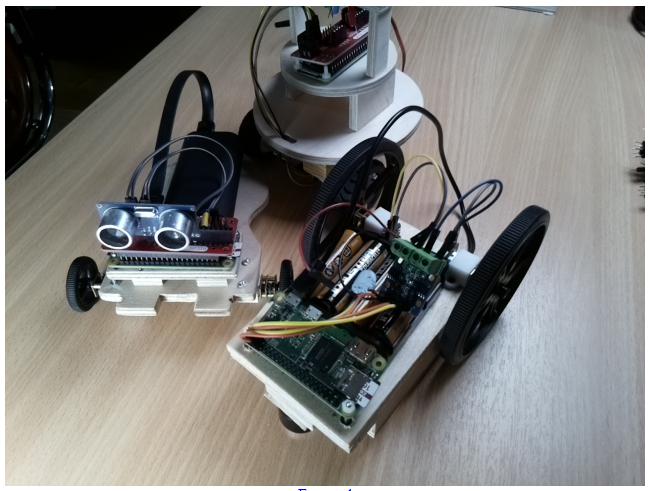
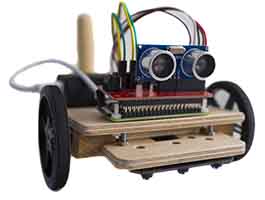
- A robot based on the Raspberry Pi.
There are various ways to build a robot using a Raspberry Pi, and pretty much any approach will do. This build-a-buggy tutorial gives a very cheap and simple way to build one. In the following notes, I will assume that you have built something like this, which uses the gpiozero Robot class. If you have built your robot in a different way, e.g. using a different motor driver, you will need to adjust your code accordingly.
The following simple code uses the gpiozero Robot class to move a robot forwards, backwards, left and right, and then stop.
# Imports
# -------------------------------------------------------------------------------------------------
from gpiozero import Robot              # controls the robot hardware
from time import sleep

# Globals
# -------------------------------------------------------------------------------------------------

# Set the GPIO pins used to connect to the motor controller
robot = Robot(left=(19,26), right=(16,20))

# Main program
# -------------------------------------------------------------------------------------------------

robot.forward(1.0)
sleep(1)
robot.backward(1.0)
sleep(1)
robot.left(1.0)
sleep(1)
robot.right(1.0)
sleep(1)
robot.stop()
To make this controllable from our web server, we need to listen out for MQTT messages directed at our robot.
Install and test the MQTT python library
First, we need to install the Paho MQTT client library, so we can receive messages from the web server. This is the same library we installed on the server. Install it using the following command:
sudo pip3 install paho-mqtt
Test it by running this:
python3 -c "import paho.mqtt; print(paho.mqtt.__version__)"
You should see the version number, something like this:
1.5.0
Now we need to import the Paho MQTT client library:
import paho.mqtt.client as mqtt # provides IoT functionality to send messages between computers
Next, we need to specify the broker and the topic.
The broker is the name of the computer which coordinates the messages on our network.
This needs to be the same broker that we specified in the web server, which if you remember was the web server itself (which for me was called web-server).
The topic is like a channel on which we will send the message. Each of our robots will have it's owne topic. In this case my robot is called clarissa.
# Settings for MQTT communication
MQTT_BROKER = "web-server"              # Change to name of your broker
MQTT_TOPIC = "robots/clarissa"          # Change to name of your topic
Now we can create a function that is called when we successfully connect to the broker:
def on_connect(client, userdata, flags, rc):
# Called when the client receives connection acknowledgement response from the broker

print("MQTT Connected with result code "+str(rc))

# Subscribing in on_connect() means that if we lose the connection and
# reconnect then subscriptions will be renewed.
client.subscribe(MQTT_TOPIC)
We need another function that is called when the robot receives an actual message on the robots/clarissa topic:
def on_message(client, userdata, msg):
# Called when a PUBLISH message is received from the broker

# Extract the message
m = msg.payload.decode("utf-8")
print(msg.topic+" " + m)

# Depending on the message received, make the robot respond
if m=="forward":
    robot.forward(1.0)
elif m=="backward":
    robot.backward(1.0)
elif m=="left":
    robot.left(1.0)
elif m=="right":
    robot.right(1.0)
elif m=="stop":
    robot.stop()
As you can see, depending on the message received, the robot will move forwards, backwards, left or right, or stop.
Our main program needs to create the MQTT client and set up connections to the two functions above:
# Create an MQTT client, which will allow the robot to receive messages
client = mqtt.Client()

# Set up the function that will be called when we connect to the broker
client.on_connect = on_connect

# Set up the function that will be called when we receive a message
client.on_message = on_message
Finally, we can connect our robot to the broker so that it can start listening for messages
# Connect to the broker, so we can receive messages
client.connect(MQTT_BROKER)

# Now just loop, waiting for messages
client.loop_forever()
The above code can be found in the robot directory that you downloaded from GitHub when you built the web server. Or you can go directly to it here.
Once you have the code set up on your robot, you can run it from a terminal session on the robot:
python3 mqtt-robot.py
If that all worked, you should now be able to control the robot from the web page!
Sharing the Web Page with your Friends
Now that you can control your robot from a web page, it would be nice to be able to get your friends to control the robot from their own computers, wherever they are in the world.
For this, you need to expose your web server to the internet.
To do this permanently, you would need to configure your router to forward traffic to port 80 to the local IP of the web server.
A lot of routers also have a virtual DMZ setting, where you can configure your web server to sit in a DMZ so it receives all incoming internet traffic.
The exact configuration depends on your specific router and this may not be straightforward.
Ngrok
So here's a really quick and simple way to do this using a service called ngrok.
The following should be done from the web server:
First, you need to download ngrok. You can get it here but the easiest way to download it is to use wget:
wget https://bin.equinox.io/c/4VmDzA7iaHb/ngrok-stable-linux-arm.zip
Then unzip it:
unzip ngrok-stable-linux-arm.zip
Finally, run the following command:
./ngrok http 5000
You should see something like this:
Session Status                online
Session Expires               7 hours, 59 minutes
Version                       2.3.35
Region                        United States (us)
Web Interface                 http://127.0.0.1:4040
Forwarding                    http://5c5fbc96.ngrok.io -> http://localhost:5000
Forwarding                    https://5c5fbc96.ngrok.io -> http://localhost:5000

Connections                   ttl     opn     rt1     rt5     p50     p90
                          0       0       0.00    0.00    0.00    0.00
This shows that ngrok has mapped the external URL (in the above case https://5c5fbc96.ngrok.io) to the internal URL on your web server where our web site is running.
If your friends now navigate to the external URL they will see your web page and be able to control your robot!
Note that there are limitations with this approach. Most significantly, the external URL will change every time you run this. But it's a quick way to give your friends the thrill of driving your robot around your living room!
Don't foget to stop your camera when you are finished. The camera will be exposed to anyone who connects to the external URL!
Taking it further
This code has been kept simple and understandable. You can make lots of improvements! Try adding more robots, or making the user interface better.
Take a look at the full version of this application on Github here. This is the version we use for our occasional online robot games.
©2025 - Think Create Learn Ltd